If you’re new to ChromeOS or haven’t wanted to print from a Chromebook yet, don’t worry – it’s easy. Google designed Chromebooks to simplify computing while keeping these affordable devices powerful and versatile enough to meet everyday needs.
In most cases, the process is the same as with any other computer. If you have any problems, it is also possible to go back to the Android devices built into the current Chromebook. Android enjoys better support from publisher developers than ChromeOS.
Connecting a printer to your Chromebook is very easy through Settings, but ChromeOS has a different interface than Windows and macOS. Here’s how to set up a wired or wireless printer to print from your Chromebook.
If you don’t have a printer yet or are thinking of a new model, you should check out our guide The best Chromebook printers you can buy. This will make everything easier.
Configure your printer with Wi-Fi
If you don’t have your printer on your wireless network, you can use the integrated interface or smartphone app to walk yourself through the setup wizard. Otherwise, you will need this manual, which you can download from the manufacturer’s website.
If you do not have access to a wireless printer, go to the next step. Otherwise, start by turning on the printer and making sure it’s working properly and connected to the wireless network.
Step 1: Open the Launcher by selecting the round button at the bottom left.
Step 2: Start typing “printer” in the search box above the launcher, then select it Add a printer from Perfect Match list below.
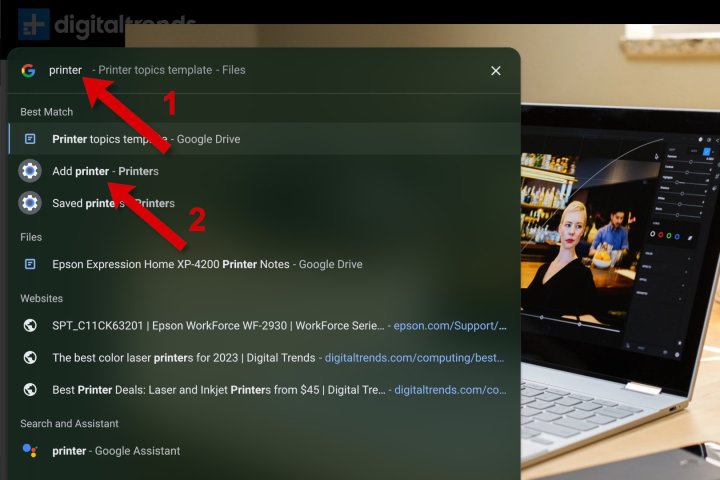
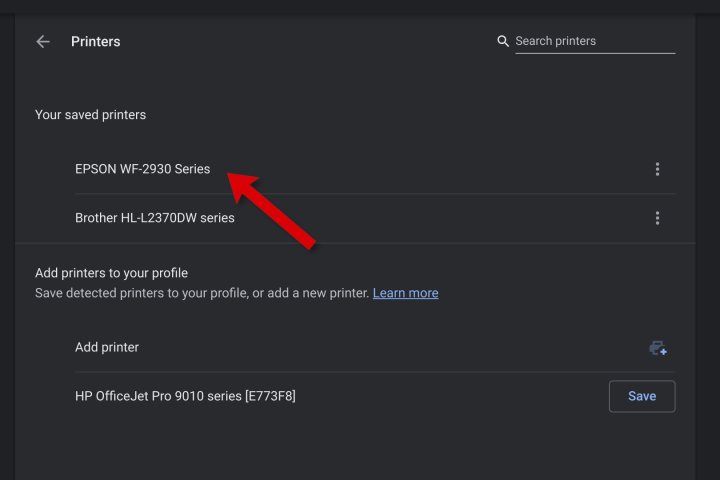
Step 3: If you have added printers, they will be displayed in the list of saved printers. Below, you will see the available printers Save or Sit down.
You can understand HP OfficeJet Pro 9015e (shown as the 9010 series) in the series, and works well with Chromebooks. Epson WorkForce WF-2930 it’s a good way.
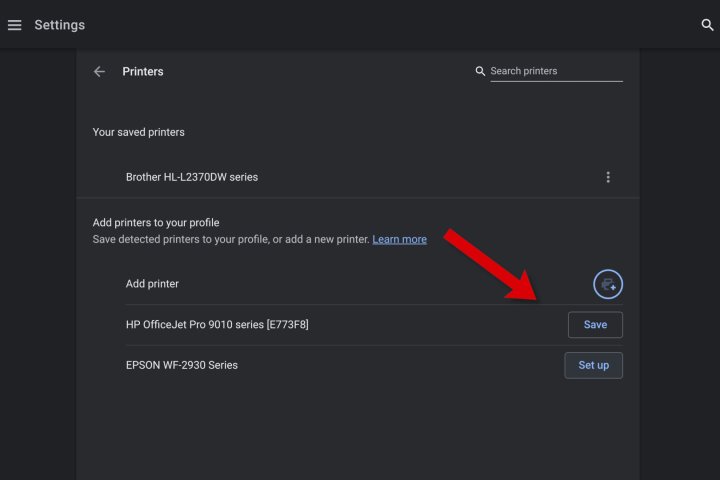
Step 4: Choose Save or Sit down to add the printer to your saved list so that it appears as an option when you want to print a photo or document.
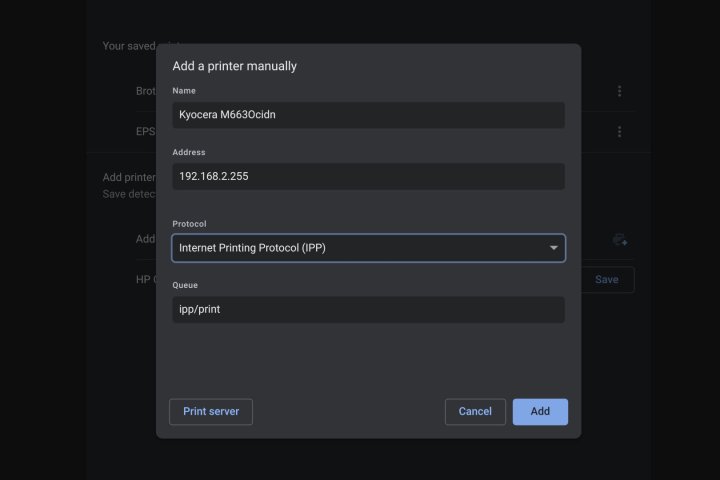
Step 5: If your printer does not appear, click the blue button In addition sign to the right of Add a Printer. A pop-up window appears for you to enter the printer’s name, IP address, protocol (usually IPP), and line (usually ipp/print).
The printer’s website should tell you which protocol to use and how to find your printer’s IP address.
Connect your printer with a USB cable
If your printer is old and doesn’t support Wi-Fi, you can connect your printer using a USB cable. However, this method may not work on older printers because you cannot install software or drivers on a Chromebook.
It is often easier to use Wi-Fi. Although modern printers support USB connection, the necessary cable is not included.
Step 1: Connect your printer’s USB cable to the appropriate port on the Chromebook. You may need a USB-A to USB-C adapter, depending on the Chromebook model. Also, make sure the printer is turned on and working properly.
Amazon Basics
Step 2: Once connected, a notification will appear, giving further instructions.
How to print on a Chromebook
Now that your printer is set up, you’re ready to print from your Chromebook.
Step 1: Open the page or image you need to print and print Ctrl+P keys at the same time. Alternatively, you can select the three vertical dots in the upper right corner and select it Print it from the drop down menu.
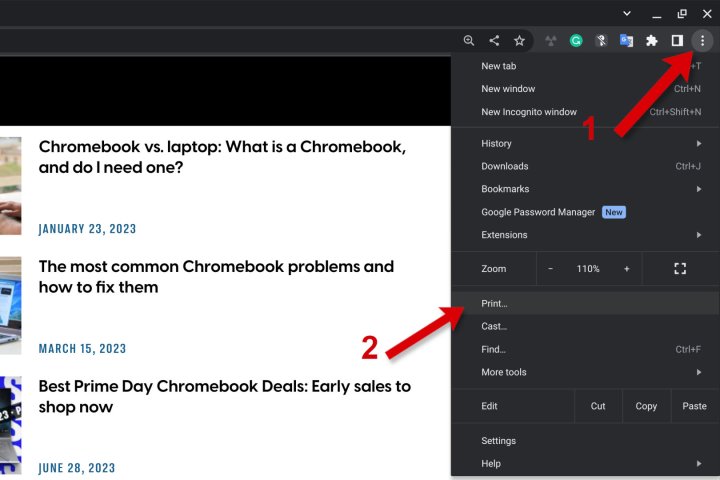
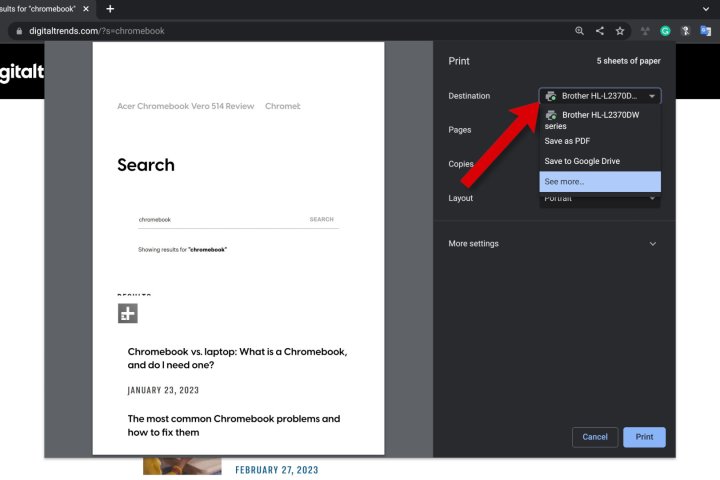
Step 2: A pop-up window will display printing options. If you don’t see the printer you want next to it Destinationselect the down arrow and select the printer you want.
Step 3: Choose Other interests to view additional information.
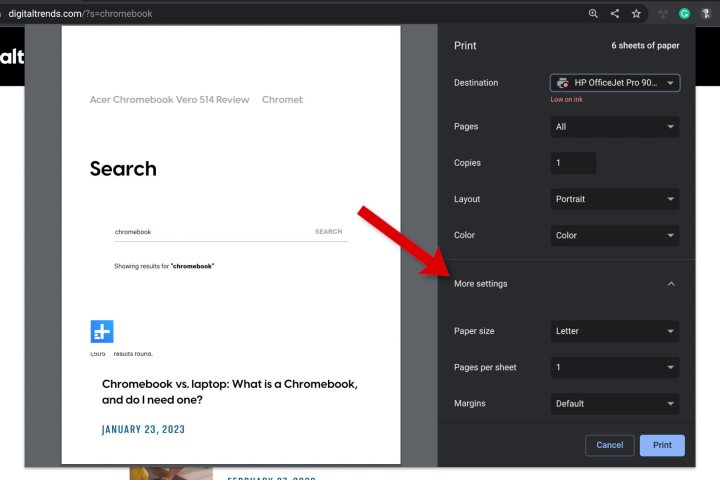
Step 4: Scroll down to see all the controls. Choose Advanced preferences for many other things.
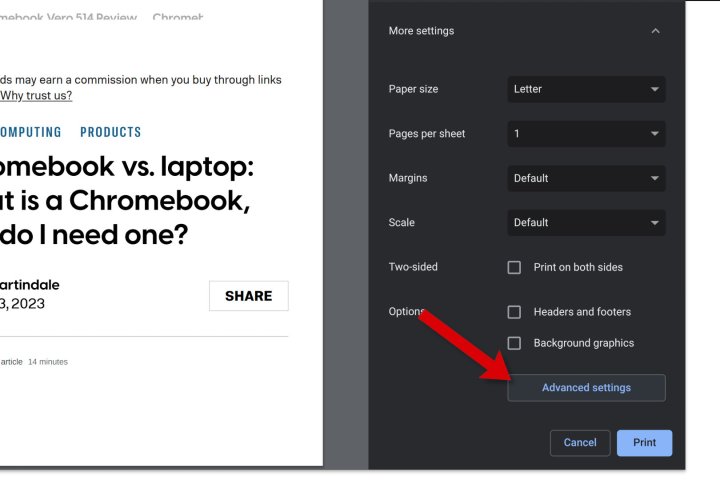
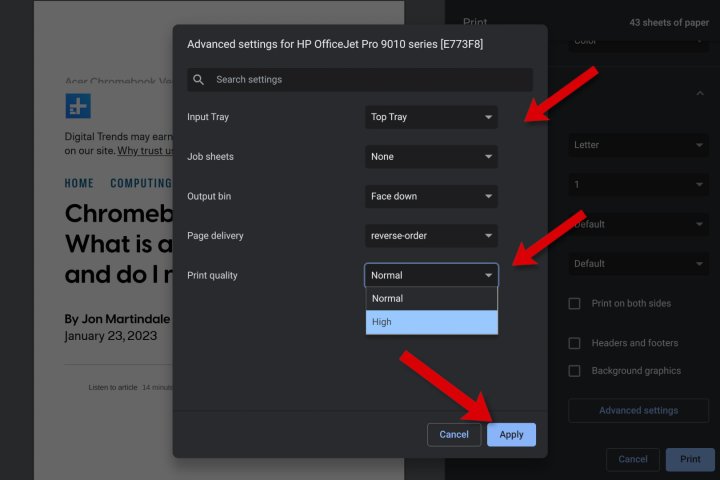
Step 5: A new window opens where you can choose the support and output trays, you like Print quality, etc. Choose Apply to return to the print window.
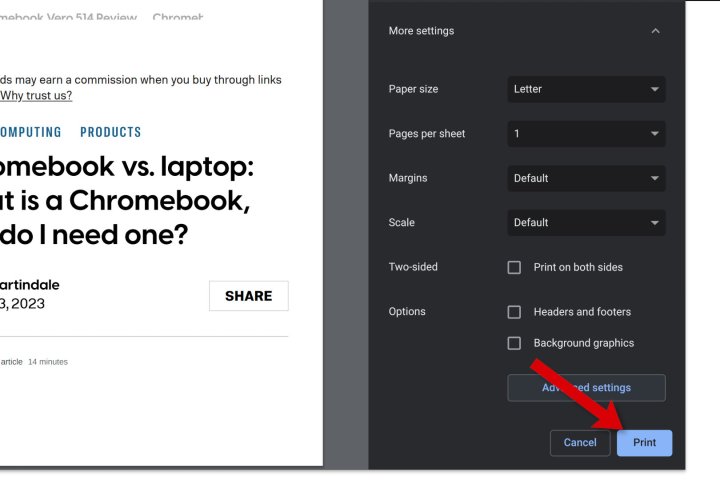
Step 6: Once everything is set to your liking, select it Print it button to start printing.
Print with your all-in-one printer
A Chromebook can also be connected to a scanner or a full-size printer that has a scanner.
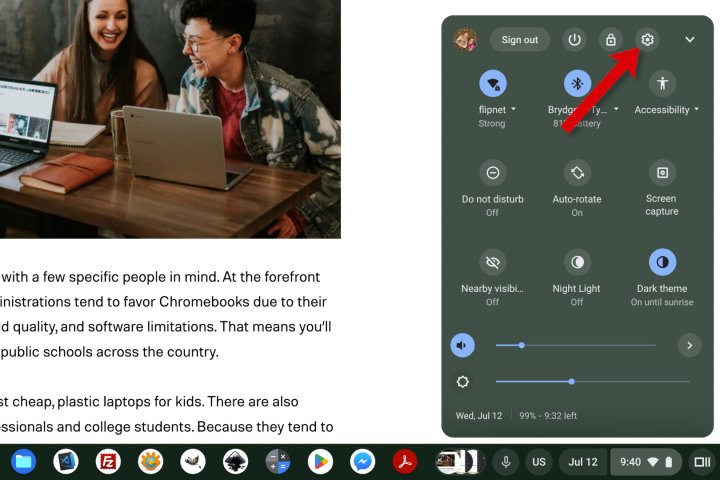
Step 1: Select the clock in the bottom right and make sure your Chromebook is connected to the same network as the printer.
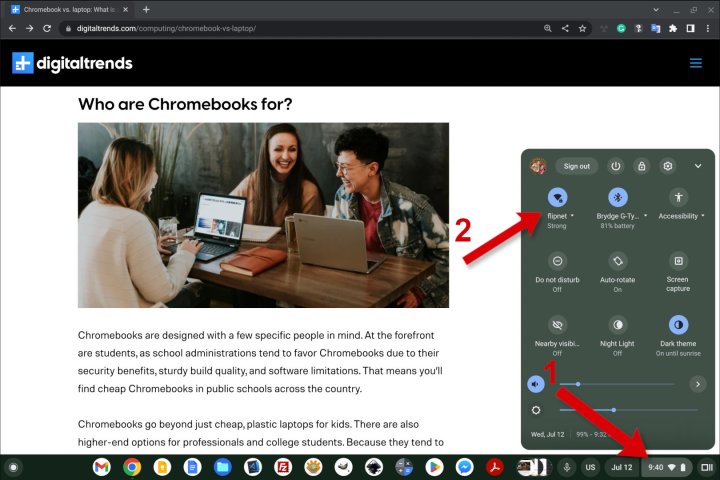
Step 2: With the popup menu still active, click the gear icon.
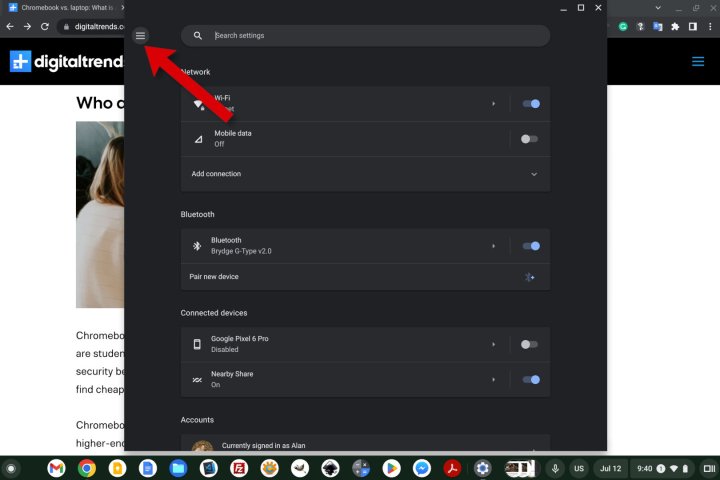
Step 3: The Favorites a window will appear. Open the left panel by selecting the three lines in the upper left corner.
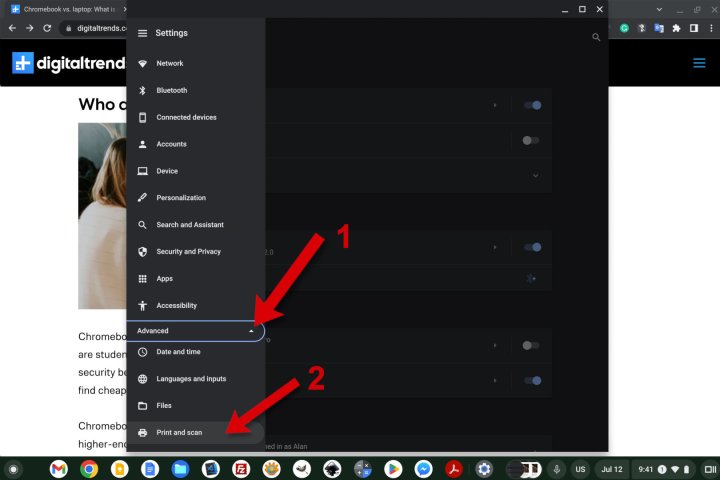
Step 4: Select the down arrow next to High quality expand the menu., then select it Print and scan to open the printer settings.
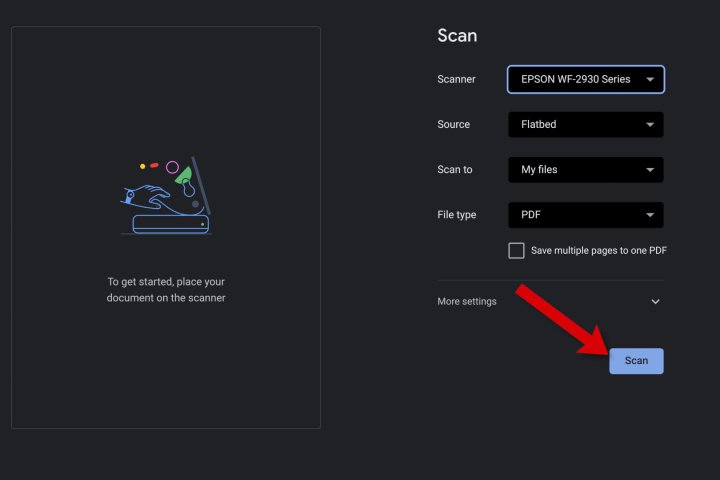
Step 5: Choose a Draw it the way to open the window and controls to analyze.

Step 6: The Draw it a window will allow you to select your scanner or printer as a whole and more. When you are ready, choose Draw it button.
Print with the Android app
If you have any problems accessing your printer or other features are not available through ChromeOS, you can easily install the printer maker’s Android app. Then you can get all of the same power you can from your phone.
Step 1: Select Launcher at the bottom left of the window to launch the search. Start typing “Play Store” and select the app when you see it.

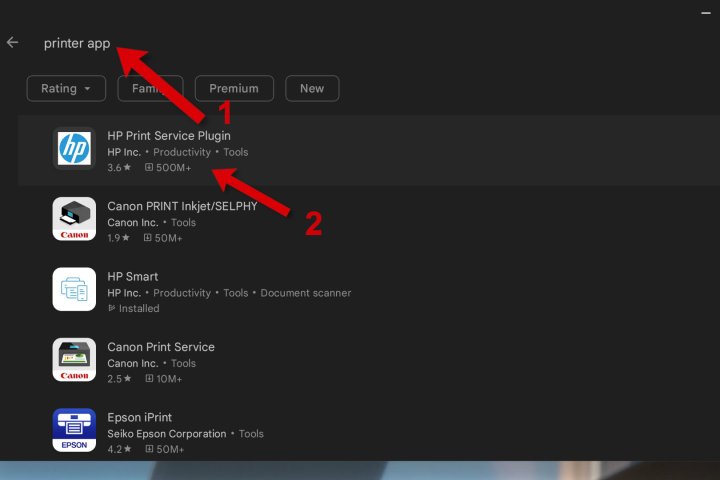
Step 2: In the Play Store, type in the manufacturer of your printer or simply “printer app” and browse the list to find the appropriate app. HP, Epson, Canon, Brother, and more will be available.
Step 3: Once you have installed the correct software for your printer, open it and follow the manufacturer’s instructions to connect and start printing.

Once you know how to print from Chromebook and get special tools for your printer from The Android app is running on ChromeOSyou may also consider whether you still need a Windows PC or Mac. The best Chromebooks they’re a decent computer now, but they’re still cheap and easy to maintain. Add a printer and suddenly, you can handle all kinds of office and school work even on a tight budget.
Editor’s Note