Review it – So you like puzzles? Then prepare for the impossible! Not only ROKR Magic Cello a 3D Wooden Image, but it’s a standard music box that works as soon as you assemble it! But make no mistake: it is very difficult. Did Cello defeat Bob, or did Bob defeat Cello? Let’s find out. To the comments!
What is it?
ROKR Magic Cello is a 3D wooden model that creates a music box that works like a self-playing cello.
What’s in the box?
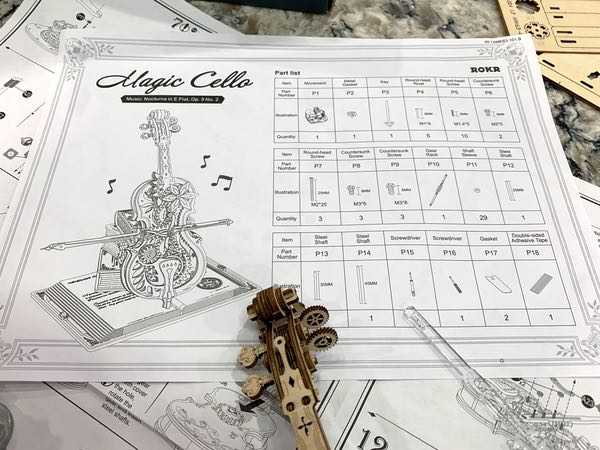
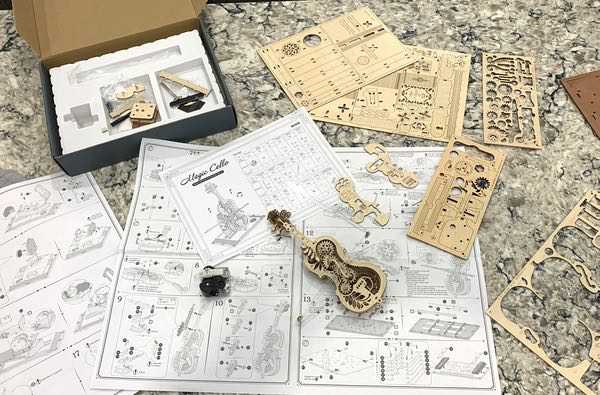
You will find everything you need to make a ROKR Magic Cello model in the form of wooden sheets with parts already cut into templates, various assembly parts (small screws, rods, gaskets, etc.), and installation materials all together. There are more than 200 pieces in total.
Design and appearance
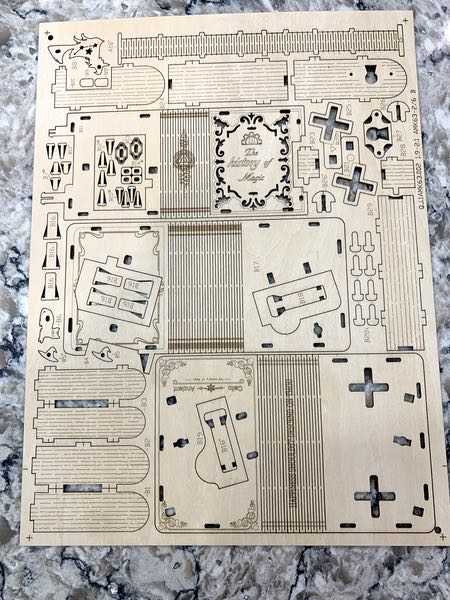
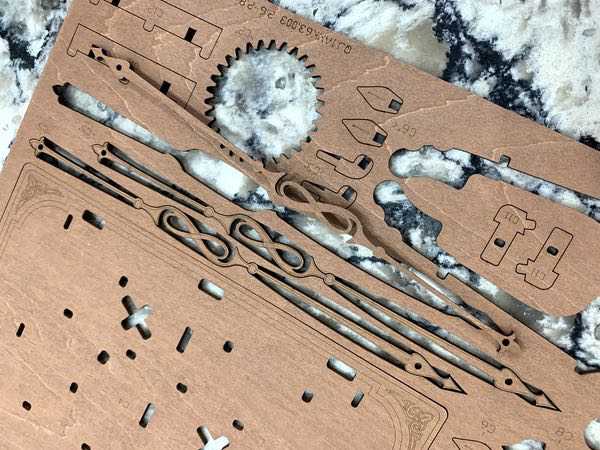
Let’s start by setting up the part of the journey you are doing with the ROKR Magic Cello. Shown here are all the goodies that come in the package.
The star of the show is the wood that is the most important part of your construction. You get a bunch of thin wood in different colors & designs and laser cut parts so you can nail them to the outside of the stamps.
Each piece is numbered on a wooden sheet to follow the instructions below.
Next, you have the connector connectors made from metal or plastic depending on the part. The product list is shown below…
The pieces themselves, with some exceptions, are very small. Shown here are the fasteners and caps that you’ll be seeing quite a bit (my scale hand).
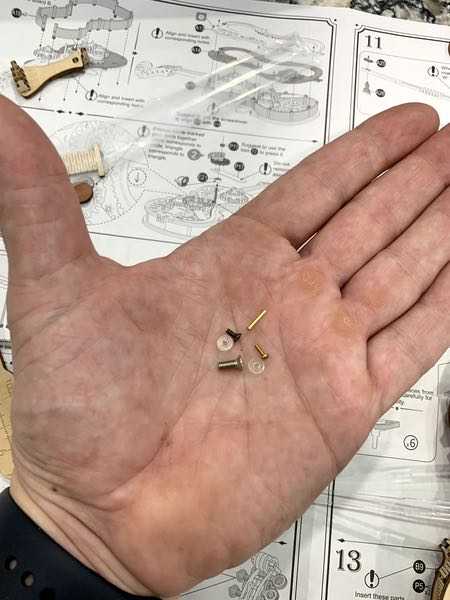
They come polybagged, but it’s important to note that the labels on the bags DO NOT conform to any guidelines. You will find “actual size” printing references in all the instructions as shown in the second picture below to fit the piece with the work.
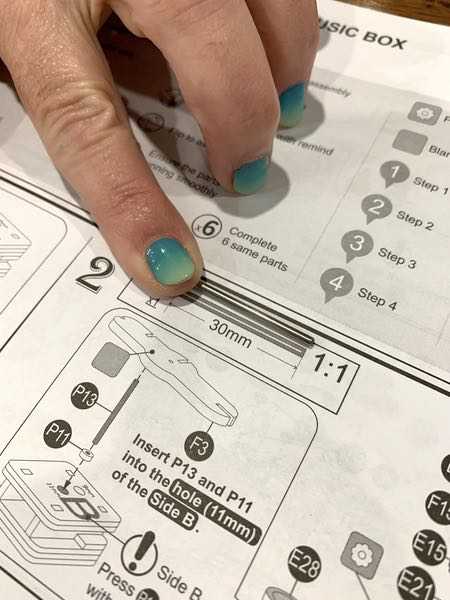
Your parts include the mechanical heart of the music box and the music box.
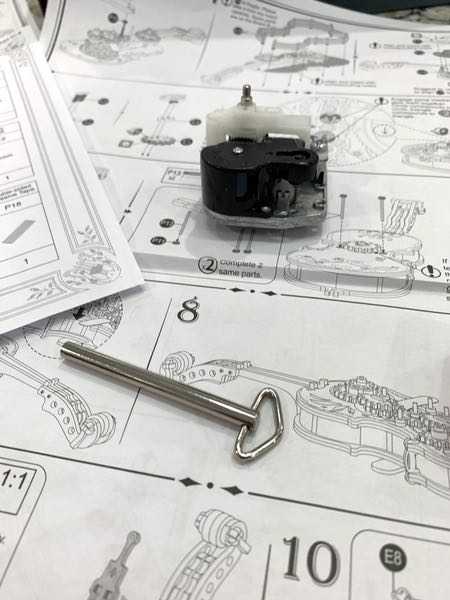
Finally, you have the tools included with the ROKR Magic Cello kit for the workshop. One of them is a wooden tool that comes out of the template. You get two separate screwdrivers, and what I’ll call an “assembly” that you build as your first project to get started.

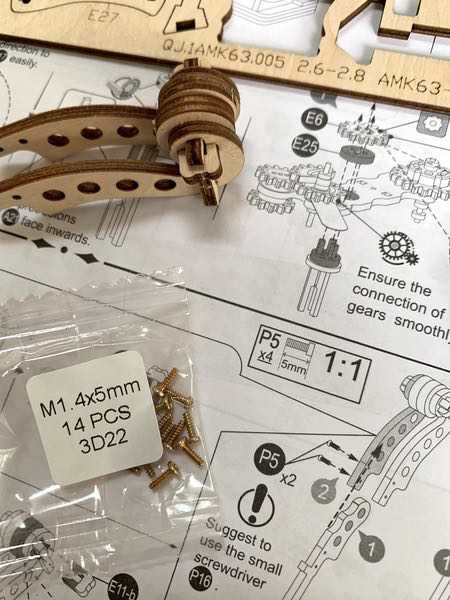
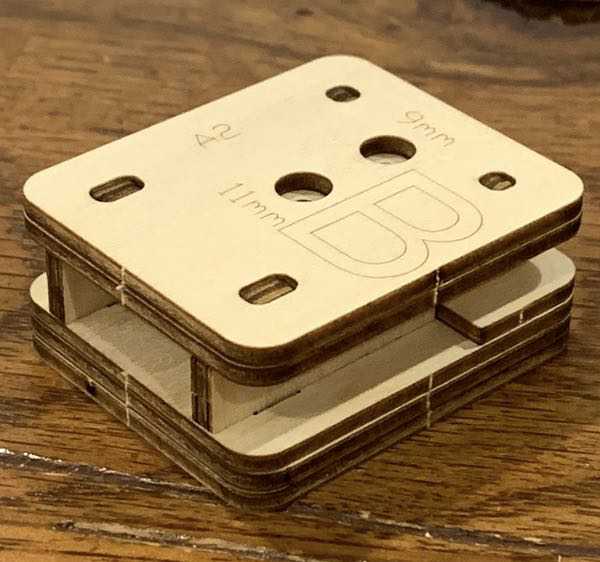
Here is a close up of the block. Do you see those little holes on the face? It is repeated in all directions. A number of jobs in assembly require an anchor or backstop to force things together, the main one being these plastic glasses that you push into the end of a rod to create a barrier.
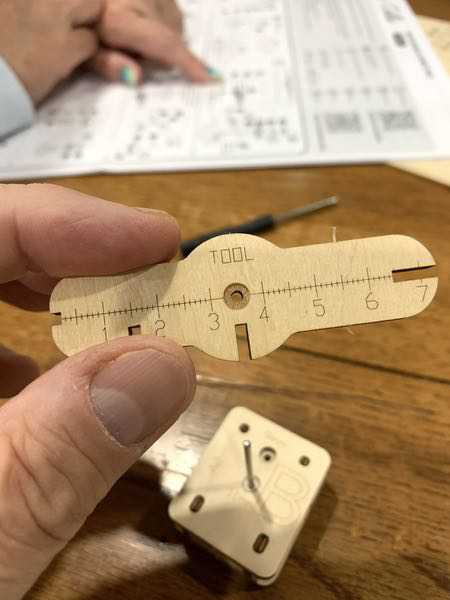
Here is an example of one such below. I put one of the rings in the tool, then used a wooden tool to insert the stick into the ring. That woodworking tool serves a number of functions such as a press, guide, and router depending on the parts you are assembling.
Many jobs involve inserting wood into other wood structures. There is pressure and manipulation involved in getting things where they need to go. This is usually in a few places as you can see here.
These all come with important assembly instructions. Two 22″ and 17″ instruction sheets accompany the kit, breaking the building down into 18 “sections” that can each include multiple steps.
These steps come with a helpful guide, as the instructions use iconography to highlight steps that may require special attention.
That is the basis of the ROKR Magic Cello instruments you are dealing with. The manufacturer says the construction time is 4.5 hours.
Procedure
I won’t lie: The ROKR Magic Cello won me over. But it did so in a very beautiful way.
Let’s take a quick look at the package to see what it SHOULD look like. I recommend you follow the link below to see the finished piece on their website. It is very beautiful with intricate details, different types of wood, and a lot of complexity in the group.
You will start by assembling small parts. Here’s an example of one piece where I’m using a connecting block as a base to put the rods on a set of components.
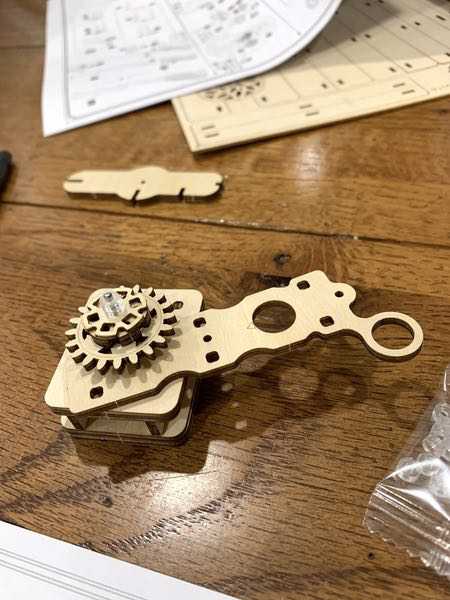
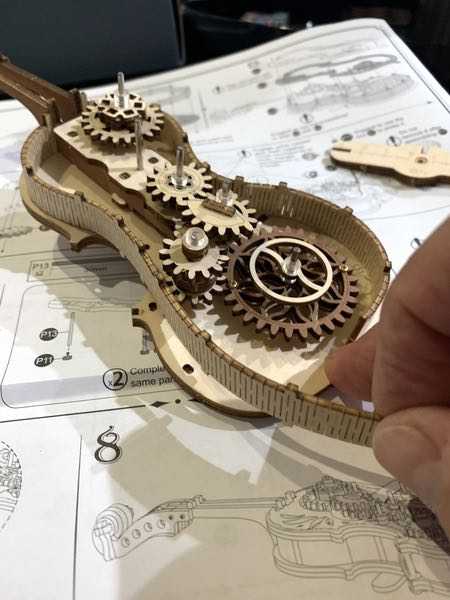
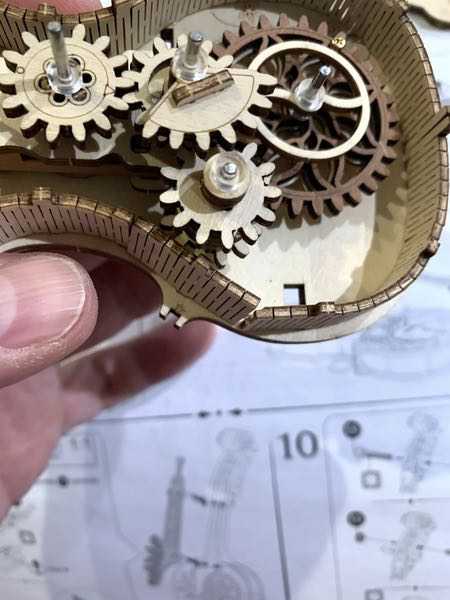
Here I have started taking small things and adding them to the body of the instrument. See the little gears, spacers, and struts?
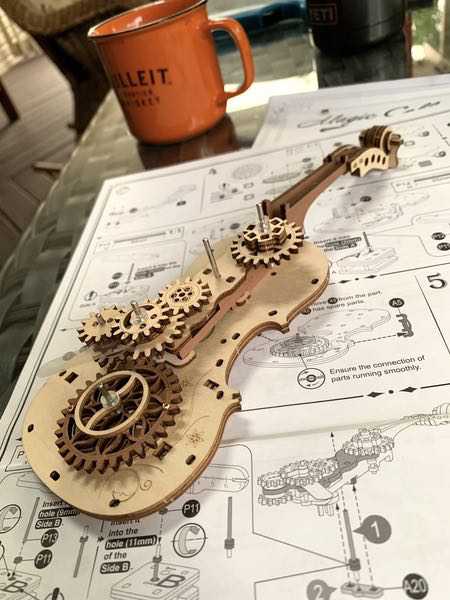
And here is my latest progress, after 8-10 hours of work. And I think I’m almost done.
Why is that so? Hard and sweet, my friends. You have many parts, complicated instructions, and some very weak parts that require a lot of patience to come together properly.
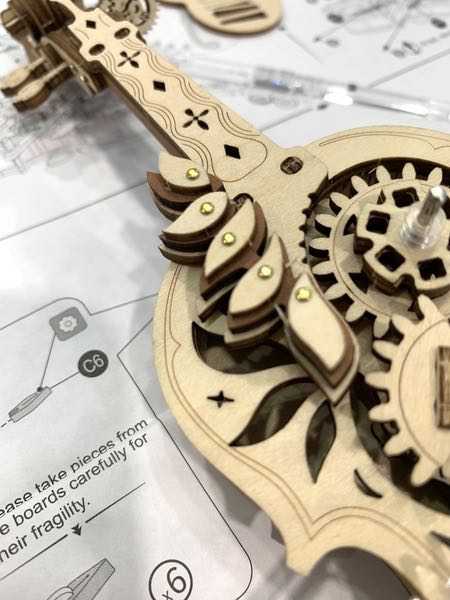
Some pieces are easy to produce even small ones, such as the small disks and key notes shown below which will be part of the cello head (you can see them in other pictures).
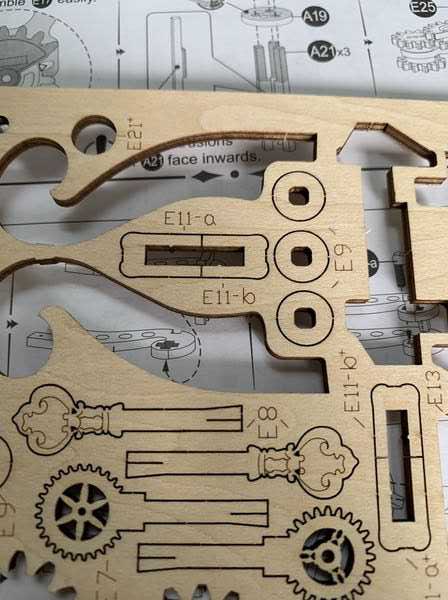
Some pieces, however, are very fragile and require careful removal to prevent damage. The good news is that tools often have multiple copies of the same part in a template. You still have to be very careful, though, as the delicate roll can easily wear off if you don’t move slowly.
I had one problem where I broke the switch gear. The panel is cut for flexibility so it is part of the side of the tool. You can group it and place it in tabs as shown below…
When I came around to this part of the body, however, I broke the first group. And secondly. I had already used a third party on the other side, so I just had to work with them.
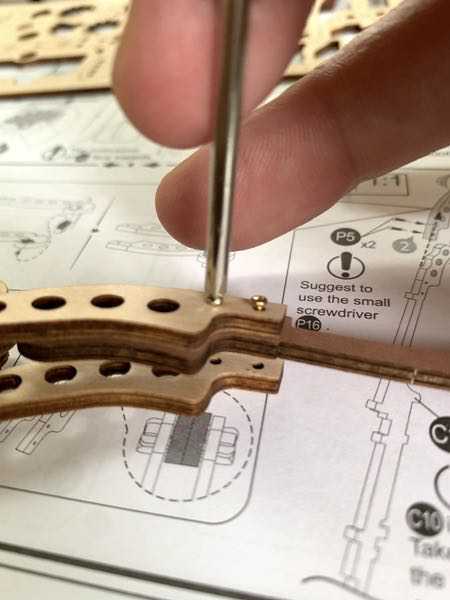
You also have a small group, like these little screws that connect two pieces of wood…
Or these beautiful designs made in light/dark/light wood combinations, each made from particles smaller than my pinky fingernail.
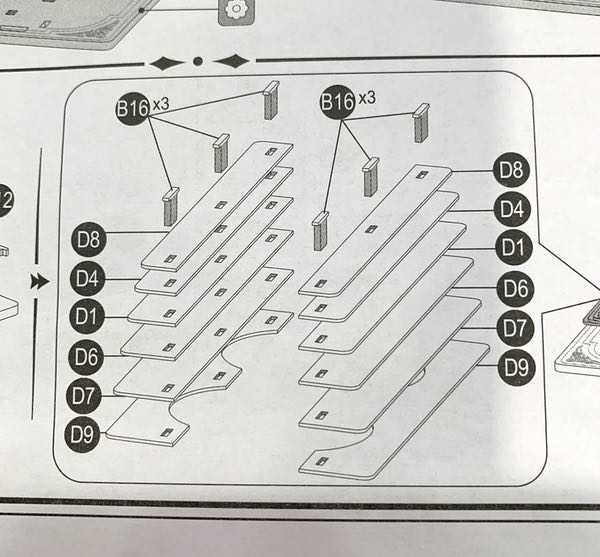
Then you will find wooden parts that need to be pressed (forced) to fit together, like the stack shown in the instructions…
…
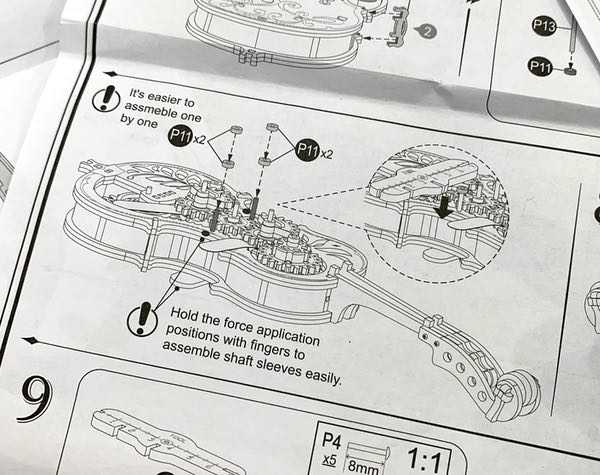
All of this is accompanied by a few warnings and cautions to ensure that the gears fit together, the pieces move smoothly, and that you don’t use too much force to break things.
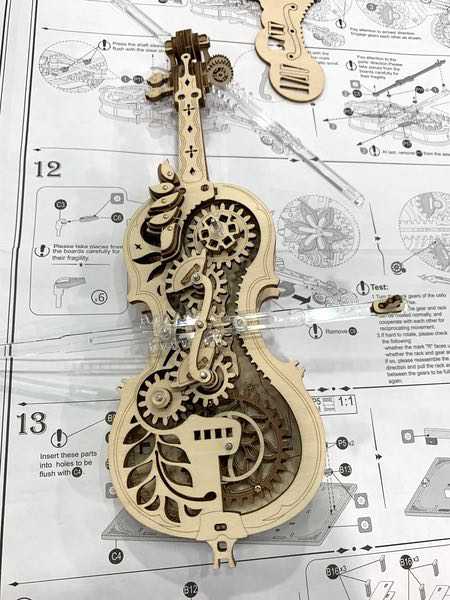
This was my last known construction site from yesterday. I honestly don’t know how anyone can build this in 4.5 hours, unless you have similar experiences. I still have half of the instructions and parts to finish!
It’s a lot.
Don’t get me wrong – the finished piece looks like it’s going to be beautiful – but it takes some special ideas to get there. The complexity of the construction requires patience to apply the basic instructions. Combine this with fractions and fractions, and the task becomes much more difficult. I would not recommend it to people with vision problems or motor problems. Also this may not be good for beginners to adopt this type.
For me, the ROKR Magic Cello was too much. I’ll keep plugging away, but I feel like this is an image that gets attacked a little better over time. Your tours can vary depending on your comfort level with these types of photos.
Which I like
- Beautiful, detailed pieces
- It’s hard if you want a hard challenge
What I would change
- It takes a lot of patience
- Small parts can break and require care
- Instructions can be difficult to follow
Final thoughts
The ROKR Magic Cello will provide the perfect challenge for the more experienced cello enthusiast. It has a level of detail & difficulty that is not for the faint hearted. And even though I’m not finished, I respect the amount of work that went into the design of this model. To shoot, I would argue that the price is there in relation to the price ($40) and the hours you will spend on this challenge. Just know that you will spend a lot of time with this one and patience and meticulous attention to detail will be essential to success.
PricePrice: $39.99
Where to buy: robotimeonline.com
Source: An example of this drug was given by Robotime.